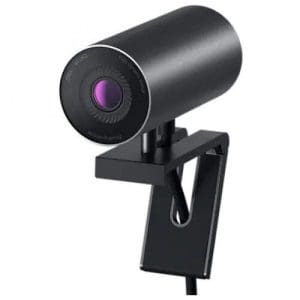
Dell Webcam Driver Windows 10
Published:
October 23rd, 2023
Updated:
October 23rd, 2023
Developer:
Version:
1.0.06
Platform:
Dell Webcam Driver Windows 10
Table of Contents
How to Update the Dell Webcam Driver After Installing Windows 10?
If your Dell laptop’s camera isn’t working, you may need to reinstall or update the driver. The best way to do this is to search for Device Manager in Windows and then click the top result. So, the latest version of Dell Webcam Driver Windows 10 is provided here to download.
Once the Device Manager opens, locate the option that says Imaging devices or Cameras. You should see your Dell webcam in one of these options.
How to Download and Install the Driver?
To download and install a Dell Webcam Driver on a Windows 10 computer, follow these steps:
- Identify Your Dell Laptop Model:
- To ensure you download the correct driver, you should know your laptop’s exact model. You can usually find this information on a sticker on the bottom of your laptop or in the system information.
- Enter Your Service Tag or Choose Your Model:
- You can enter your Dell laptop’s service tag or select your laptop’s model from the list provided on the Dell support website. This helps the website identify your laptop and provide you with the appropriate drivers.
- Locate the Webcam Driver:
- Once you’ve entered your service tag or selected your laptop model, you’ll be directed to a page with drivers and downloads specific to your laptop. Look for the webcam driver under the “Drivers & Downloads” or a similar section. The webcam driver may be listed under the “Video” or “Camera” category.
- Download the Webcam Driver:
- Click on the webcam driver download link or button. This will start the download process. Make sure to choose the driver that is compatible with your Windows 10 operating system.
- Install the Webcam Driver:
- Once the driver file is downloaded, locate the file (usually in your Downloads folder) and double-click it to run the installer.
- Follow the on-screen instructions to install the driver. This may involve agreeing to terms and conditions, selecting installation options, and allowing the driver to make changes to your system.
- Reboot Your Computer:
- After the installation is complete, it’s a good practice to restart your computer. This ensures that the driver changes take effect.
- Test Your Webcam:
- After the restart, open a webcam application (e.g., Camera app or Zoom) to test if your webcam is working properly. If it is, the installation was successful.
Remember that Dell’s support website is regularly updated, so it’s essential to use the latest available drivers to ensure compatibility and performance. If you face any issues during the installation process or with your webcam after installation, you can also check for updates through Windows Update or contact Dell’s support for assistance.
Uninstalling the webcam driver:
If you are using a Dell laptop and can’t use the built-in webcam because apps won’t recognize it, you may have a problem with the camera driver. This is a piece of software that acts as a mediator between the hardware/peripheral devices and the operating system installed on the computer. If this driver is missing or corrupted, it can cause several issues related to the device.
One way to fix this problem is by uninstalling the driver. This can be done by right-clicking the cam name in the Imaging Devices or Cameras branch of the Device Manager and selecting “Uninstall device”. Once the device is uninstalled, you can reboot your computer and check whether the camera is working properly.
You can also try resetting your BIOS or UEFI to factory default settings. This can help resolve BIOS and UEFI problems that might be preventing the Dell camera from working. This process can be difficult, so you should consult your laptop’s user manual for more information.
Another option is to download a Dell camera driver update utility, which can automatically find and install the correct version of the driver for your device. This can be a convenient solution for novice computer users, as it eliminates the need to search online for the right driver or manually update the drivers. In addition, this tool can back up your current drivers for future use.
Scan for hardware changes:
If you have a Dell laptop with an integrated webcam, it’s important to update the camera driver in case it has stopped working after installing Windows 10. To do this, open the Device Manager, expand Imaging Devices or Camera, and right-click on your device. Select Uninstall the device from the options provided. When the uninstall window appears, click Yes to confirm. Once you’ve done this, restart the laptop and check if it works.
If the camera still isn’t visible in Device Manager, try scanning for hardware changes. This will help the operating system find the driver and install it automatically. Once this is complete, restart your computer and try using the camera again. If the issue persists, you can always download and install a new driver from the Dell website.
A third-party software application can also help you resolve the problem of your Dell laptop camera not working on Windows 10. These applications scan for outdated, corrupt, or missing drivers and repair them instantly. This will restore your PC’s performance and improve its overall stability. Moreover, this software can detect the best drivers for your Dell laptop model and install them with one click. The best part is that you don’t need to waste time searching for the correct driver online. In addition to this, these tools can also update all the necessary system drivers at a fast pace.
Disabling antivirus software:
When you’re using your Dell laptop, chances are that you’ve got a webcam that allows you to communicate with other people virtually. This is useful for things like Skype, Google Hangouts, or Microsoft Teams meetings. However, your laptop’s camera may not be working all of a sudden for various reasons. It could be because of a missing driver after an update or the antivirus software might be blocking access to it. There are several ways to resolve this issue, including disabling your antivirus software and choosing which apps can use the camera.
To solve this problem, you can disable your antivirus software for a short period of time to see if it fixes the issue. If it doesn’t, you should consider rolling back your device driver to the previous version. This can be done by navigating to the Device Manager and clicking on the arrow next to Imaging Devices or Cameras.
Another option is to check your computer’s privacy settings. Some antivirus software and third-party security software come with settings that block access or permission to use your camera. If this is the case, you’ll need to visit your antivirus software’s website for support. You can also try resetting the BIOS or UEFI to default factory settings to see if that resolves the issue. If you’re unsure how to reset the BIOS or UEFI, you can refer to your Dell computer’s user guide for step-by-step instructions.
Updating the webcam driver:
If your laptop’s camera isn’t working properly, it may be time to reinstall the webcam driver. You can do this manually or using a third-party application that can automatically download and update drivers for you. This method is usually faster than manually searching for the drivers on a manufacturer’s website and installing them yourself. It’s important to keep your computer’s drivers updated because out-of-date drivers can cause a variety of problems, from slow performance to missing features.
When you install the new driver, it will scan your system for outdated or corrupted files. Then, it will replace them with the latest version, ensuring your laptop’s camera is functioning correctly. After the process is complete, restart your laptop and check if your webcam is working.
Before you reinstall the driver, make sure that you have enabled applications to use your laptop’s camera in Windows 10. You can do this by going to Start – Settings – Camera and selecting Allow access to this device for specific apps.
You can also try running a system scan with a tool like Driver Talent, which will find and fix all outdated drivers for your computer, including the Dell camera driver. Once the process is complete, you’ll be able to use your webcam again. It’s important to keep your PC’s drivers up-to-date because they can affect everything from your CPU speed to the functionality of your hardware.