Galaxy S7 Drivers for Windows 10
Published:
September 28th, 2023
Updated:
September 28th, 2023
Developer:
Version:
1.7.59
Platform:
Galaxy S7 Drivers for Windows 10
Table of Contents
Galaxy S7 Drivers For Windows 10:
Galaxy S7 Drivers for Windows 10 is a free program for PCs or laptops running on the Microsoft Windows Operating System. It is in the input devices category and it is completely safe for your computer or laptop.
If your Samsung Android phone is not getting recognized by odin or PC tools then you must install drivers on your Windows PC/laptop. Download them from the below links and follow the directions given to install them.
How to Download and Install the Driver?
To download and install the Samsung Galaxy S7 drivers for Windows 10, follow these steps:
- Download Samsung USB Drivers:
- Look for the section that provides USB drivers for mobile phones and download the latest version that is compatible with Windows.
- Install Samsung USB Drivers:
- Locate the downloaded driver file (usually a .exe file) and double-click it to run the installer.
- Follow the on-screen instructions to complete the installation process. This may involve accepting license agreements and choosing installation options. Make sure to install the drivers for your specific device, which in this case is the Galaxy S7.
- Enable Developer Options on Your Galaxy S7:
- On your Galaxy S7, go to “Settings.”
- Scroll down and select “About phone.”
- Find the “Build number” entry and tap it repeatedly (usually seven times) until you see a message that says you are now a developer.
- Enable USB Debugging on Your Galaxy S7:
- In the “Settings” app, go to “Developer options” (which is now accessible due to the previous step).
- Toggle on the “USB debugging” option. This allows your phone to communicate with your Windows PC for debugging purposes.
- Connect Your Galaxy S7 to Your PC:
- Use a USB cable to connect your Samsung Galaxy S7 to your Windows 10 PC.
Automatic Installation:
- Install Drivers Automatically:
- When you connect your Galaxy S7 to your PC, Windows should automatically detect the connected device and try to install the necessary drivers. This process may take a moment.
- Complete the Driver Installation:
- Follow any additional on-screen instructions to complete the driver installation.
- Verify the Connection:
- To ensure that the drivers are installed correctly, you can open the “Device Manager” on your Windows PC. Right-click on the Start button and select “Device Manager.”
- Look for your connected Galaxy S7 under “Portable Devices” or “Samsung Android Phone.” If it appears without any error symbols, the drivers are installed correctly.
Now your Samsung Galaxy S7 should be recognized by your Windows 10 PC, and you can transfer files, use Samsung’s software, or debug your device as needed.
Keep in mind that Samsung may update their drivers from time to time, so it’s a good idea to periodically check for driver updates on the Samsung website and update them as necessary.
1. Odin:
Samsung Galaxy devices are among the largest players in the smartphone market. Powered by Google’s open-source Android OS, these phones offer a plethora of tweaks and customization options. But sometimes these modifications might go wrong, leading to bootloop or bricked devices. To fix such issues, flashing the official firmware is often required. Samsung offers its own Odin software for flashing such updates.
To flash the official firmware, you will require a Windows-based computer, the Odin tool’s latest version, and a standard USB cable. Once you have all the tools and requirements, launch the Odin application. To enter Download Mode, press the Volume Down + Home button simultaneously for older phones with capacitive buttons and the Volume Up + Bixby + Power button for newer devices.
Ensure that the “AP” and “CP” fields have the same file name and size, and check that the Odin “STK” tab is unchecked. If the files are correctly entered, click on “Start”. Wait for the device to reboot automatically and display the “PASS” message in the Odin window.
For more information on using Odin, check out the official Samsung support page. The Odin tool is free for all Samsung users and can help you restore your phone to its original factory settings. So give it a try and see how well it works for you!
2. Smart Switch:
Samsung Smart Switch is a software program developed by Samsung that allows you to transfer data between your PC and your Galaxy device. The application makes the switch between devices an easy and stress-free experience for users who want to keep their files, apps, images, contacts, messages, and calendars in sync across their different platforms.
The program is available for both iOS and Android devices, and it comes in a variety of versions depending on your needs. The free version of Smart Switch is limited in features and functionality, while the paid versions are more robust and feature-rich. Regardless of the version you choose, the Samsung Smart Switch offers many benefits, including the ability to backup and restore your data, as well as to update your device’s system software.
In order to use Smart Switch, you must have a valid Samsung account and a supported mobile device. You must also enable USB file transfers on your device before connecting it to the computer. Once you have done so, you can select “Backup” on the Smart Switch desktop app to back up your data.
Once you’ve backed up your data, you can connect the new Galaxy S7 to your PC and select “Restore” to send it to the device. You can select a specific backup or restore an entire account.
3. USB Driver:
Whether you are looking to transfer data from your phone to your computer or back up your Galaxy device, you need the Samsung USB Driver. This tool is an official one from the manufacturer and it’s available in two versions for Windows and macOS. Unlike Smart Switch, the standalone USB driver doesn’t require installing the manufacturer’s Kies companion software.
To download and install the Samsung USB Driver, visit the download page and click the “Download” button. Once the downloaded file is ready, go to the default downloads folder and extract it to the desktop of your computer. Then double-click the exe file and follow the prompts to complete the installation process.
Once the Samsung Galaxy S7 USB Driver is successfully installed, you should see a new device appear in the list of your computer’s hardware in the Device Manager window’s right pane. Connect your Android device to the PC via a USB cable, and then launch the Samsung USB Driver program.
Once you have connected the device, a new dialog box should appear asking if you want to install ADB and Fastboot drivers. Press Y and then follow the prompts to complete the installation. Once the Samsung ADB and Fastboot drivers are installed, you can now connect your Samsung Galaxy S7 to your computer. Then you can transfer all of your files between them.
4. Fastboot:
Samsung’s Galaxy Android smartphones are some of the most popular in the world. This makes it important that they have the right drivers so they can connect to a computer and run apps or other programs. The official Galaxy S7 driver for Windows 10 provides the software that allows a Samsung phone to communicate with a PC.
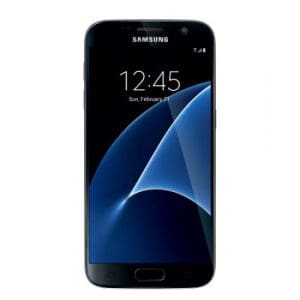
The Galaxy S7 is an Android smartphone that has a 5.1-inch screen with a resolution of 1440×2560 pixels. It comes with either 32 or 64 GB of internal storage and can be expanded using a microSD card up to 256 GB. The phone runs on Android 6.0 Marshmallow and is upgradable to Android 8.0 Oreo. It also has a dual-camera system with 12MP and 5MP cameras.
The official Samsung Galaxy S7 driver for Windows 10 enables users to connect their device as an MTP USB device and transfer files between the two devices. It can also be used to flash firmware updates on the device. It can be downloaded from the Samsung website.
To download the driver, simply click on the link above and save the file to your default download folder on the desktop of your computer. Then, double-click on the installer program and follow the on-screen instructions to install it. Alternatively, you can use a driver management tool like Driver Easy to automatically update all your computer drivers with a single click.
