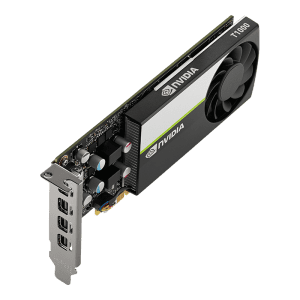
NVIDIA USBC Driver
Published:
March 27th, 2024
Updated:
March 27th, 2024
Developer:
Version:
15.2.30.280
Platform:
NVIDIA USBC Driver Download for Windows
Table of Contents
What is NVIDIA USBC Driver?
NVIDIA USBC Driver is a software program that allows your computer to communicate with the hardware installed in your NVIDIA GPU. This allows for performance improvements and updates.
Nvidia GPUs are a big investment, so it’s important to update them regularly to ensure optimal performance. This is especially important for gamers, video editors, and other resource-heavy users.
Features
NVIDIA does provide drivers for their graphics cards and related technologies. These drivers may have support for USB-C features depending on the hardware and associated functionalities.
USB-C is a versatile connector used for various purposes including data transfer, display output, and power delivery. The features related to USB-C in NVIDIA drivers might include:
- DisplayPort Alternate Mode: Many modern GPUs support DisplayPort Alternate Mode over USB-C, allowing the connection of displays directly to the GPU via USB-C. This feature requires appropriate driver support.
- Power Delivery: Some NVIDIA GPUs and associated drivers may support power delivery over USB-C. This can be used to power compatible devices or charge the device connected to the GPU.
- Data Transfer: USB-C can be used for data transfer purposes, such as connecting external storage devices or peripherals. The NVIDIA driver may include support for USB-C data transfer protocols.
- Audio: USB-C supports audio output, and some NVIDIA GPUs may support audio output through USB-C connections. The driver would facilitate this functionality.
- VirtualLink: NVIDIA has previously been involved in the VirtualLink initiative, which aimed to standardize VR headset connections using USB-C. Drivers may include support for VirtualLink connections if the GPU is compatible.
- Compatibility and Stability: NVIDIA drivers typically include bug fixes, performance improvements, and compatibility enhancements. This would ensure the stable and reliable operation of USB-C-related features.
1. Installation of Driver
NVIDIA USBC Driver is a software application that lets users connect their devices to their computers using USB-C technology. This allows for faster data transfer speeds and higher power delivery capabilities. It also supports features such as PRIME sync and DP++, which reduce screen tearing and allow for more efficient charging of peripherals.
To install NVIDIA drivers, including any potential drivers related to USB-C functionality, you can follow these general steps:
- Download and Extract the Driver Package: Once you’ve found the correct driver, download the installer package. It usually comes as a .exe file for Windows and a .run file for Linux. Save the file to a location on your computer.
- Prepare Your System: Before installing the new driver, it’s a good idea to uninstall the existing driver. You can do this through the Windows Device Manager (for Windows users) or using terminal commands (for Linux users). This step is not always necessary but can help avoid potential conflicts.
- Run the Installer: Double-click the downloaded .exe file (for Windows) or navigate to the downloaded .run file using the terminal (for Linux). Follow the on-screen instructions to start the installation process. This typically involves accepting the license agreement and selecting installation options.
- Customize Installation (Optional): During the installation process, you may have the option to customize the installation. You can choose whether to install additional components like NVIDIA GeForce Experience or only install the driver itself.
More,
- Complete the Installation: Once the installation process is complete, you may be prompted to restart your computer. If not, it’s a good idea to restart your system to ensure the changes take effect.
- Verify Installation: After restarting your computer, verify that the new driver is installed correctly. You can do this by opening the NVIDIA Control Panel (accessible via the system tray or Start menu) and checking the driver version listed.
- Test USB-C Functionality: If you’re specifically looking to use USB-C features provided by the NVIDIA driver, you can test the functionality by connecting USB-C devices such as displays, storage devices, or peripherals to the appropriate ports on your GPU.
However, installing NVIDIA USBC Driver can be a bit tricky, especially on Linux systems. This is because the drivers are proprietary and not bundled with many distributions. It can also cause problems with existing NVIDIA applications, such as GeForce Experience. To overcome this issue, it’s important to follow the steps outlined in this guide.
The first step in the process is to download the latest NVIDIA USBC Driver. This can be done by visiting the official NVIDIA website and selecting your operating system and product series. Once the correct driver is downloaded, it must be installed on your computer.
Once the driver has been installed, it’s important to restart your computer. This will ensure that the changes take effect. You should also make sure that no NVIDIA programs are running in the background, such as the NVIDIA app or GeForce Experience. Attempting to install the driver while these programs are running will fail the installation. You can also disable NVIDIA GeForce Experience in the NVIDIA Control Panel to avoid this issue.
2. Compatibility
NVIDIA is famous for its graphics cards, and many video editors, animators, and PC gamers use their GPUs. However, like all hardware products, NVIDIA GPUs have a life span and eventually, they will need to be replaced. This is why the company makes it a point to maintain its hardware long after its launch date. From bug fixes to performance optimization, NVIDIA updates are designed to extend the life of its GPUs. NVIDIA also offers a few different ways for its customers to update its drivers. One of the most convenient ways is through its GeForce Experience program.
Compatibility of NVIDIA drivers primarily depends on the GPU model and the operating system. Here’s a breakdown of compatibility considerations:
- GPU Model: Different NVIDIA GPUs require different drivers. When downloading drivers from the NVIDIA website, you’ll need to select the appropriate GPU model from the dropdown menu or use the manual search option to find the correct driver.
- Operating System: NVIDIA provides drivers for various operating systems, including Windows, Linux, and FreeBSD. Make sure to download the driver version that matches your operating system. Additionally, drivers are available for both 32-bit and 64-bit architectures, so choose the appropriate one for your system.
Other’s
- Driver Version: Ensure that the driver version you’re installing supports your GPU model and operating system version. Using an incompatible driver version can lead to stability issues or improper functioning of the GPU.
- Hardware Compatibility: While NVIDIA GPUs generally have broad compatibility with hardware interfaces like USB-C, specific features such as DisplayPort Alternate Mode or power delivery over USB-C may depend on the GPU model and its capabilities. Check the specifications of your GPU to verify its USB-C compatibility and supported features.
- Software Compatibility: Ensure that the driver version you’re installing is compatible with other software components on your system, such as games, applications, or virtual reality (VR) platforms. Incompatibilities between the driver and other software can lead to performance issues or crashes.
- System Requirements: Check the system requirements specified by NVIDIA for the driver version you intend to install. Ensure that your system meets these requirements in terms of hardware specifications, operating system version, and any other prerequisites.
- Updates: NVIDIA regularly releases driver updates to improve performance, add new features, and fix issues. Keep your drivers up to date by periodically checking for updates on the NVIDIA website or using the GeForce Experience application (available for Windows users) to automatically download and install updates.
More,
By considering these compatibility factors and ensuring that you’re using the correct driver version for your GPU and operating system, you can optimize the performance and functionality of your NVIDIA graphics card while ensuring compatibility with other hardware and software components.
Nvidia has been working to resolve issues that affect USB-C docks such as the i-tec. These docks typically employ DP MST to drive multiple displays over a single connection. This configuration can create a situation where the display’s native mode does not fit into the available bandwidth. This can result in a black screen or other issues.
NVIDIA has found that this issue is caused by the powercfg -devicedisablewake command and it can be fixed by changing this to “. This will disable the device from waking up the computer. The driver should now work fine with your laptop. You can even set a shortcut to this command to run after startup. NVIDIA is not responsible for any damages that you may suffer as a result of using this method.
3. Troubleshooting
If you’re having problems with the NVIDIA USBC Driver, it may be because of incompatibility or other issues. In this case, it’s a good idea to try some troubleshooting steps to fix the problem.
To resolve this issue, first make sure that you’re using the latest drivers. You can do this by checking the driver version number in Device Manager. If you aren’t, you can update the driver by following these steps:
You may also need to disable certain antivirus programs to prevent conflicts between them and Nvidia drivers. This will help you determine if the problem is caused by antivirus software or not.
Another possible reason for this problem is that your DirectX program is outdated. You can resolve this by updating DirectX to the latest version.
If you’re still having problems after trying these fixes, it’s a good idea to create a system restore point. System restore points allow you to roll back your computer’s operating system to a previous state when the problem was fixed. This can save you a lot of time and effort by eliminating the need to manually search for solutions online. You can learn how to do this by reading: How to use System Restore in Windows 10. Also, you can use a tool such as Fortect to automatically repair corrupt system files on your PC.
4. Recommendations
NVIDIA USBC Driver is a software application that allows users to connect their devices using USB-C technology. This allows users to transfer data at a faster rate and deliver more power than a standard USB connection can provide. This driver can be installed on Windows operating systems.
Game Ready Drivers are fine-tuned in collaboration with developers and extensively tested across thousands of hardware configurations to ensure optimal performance and reliability. Plus, they enable you to optimize game settings with a single click and empower you with the latest NVIDIA technologies. That’s what we call Game Ready.
Unlike regular displays that connect to the GPU directly, USB-C docks use DisplayPort MST to drive multiple displays over a single cable. This requires the drivers to validate each display mode (resolution/refresh rate) to ensure it fits within the available bandwidth. This is an important step to prevent display flicker and ensure compatibility with all displays and peripherals attached to the dock. Please check with your notebook’s original equipment manufacturer for certified drivers for your specific notebook.
Conclusion
installing NVIDIA drivers involves several steps to ensure compatibility and optimal performance:
- Download the Correct Driver: Visit the NVIDIA website and select the appropriate driver for your GPU model, operating system, and architecture.
- Prepare Your System: Before installing the new driver, consider uninstalling the existing driver to avoid conflicts. This step may not always be necessary but can help ensure a smooth installation process.
- Run the Installer: Execute the downloaded installer file and follow the on-screen instructions to install the driver. Customize the installation options if necessary.
- Verify Installation: After installation, verify that the new driver is installed correctly by checking the driver version in the NVIDIA Control Panel.
- Test USB-C Functionality: If you’re specifically interested in USB-C features, test the functionality by connecting USB-C devices to your GPU and ensuring proper operation.
- Consider Compatibility: Ensure compatibility with your GPU model, operating system, hardware, and software components. Check system requirements and keep drivers up to date to maintain compatibility and performance.
By following these steps and considering compatibility factors, you can effectively install NVIDIA drivers and leverage the full capabilities of your GPU while ensuring compatibility with other hardware and software components.