Thermal Receipt Printer Driver Download Windows 10 64 Bit
Published:
September 11th, 2023
Updated:
September 11th, 2023
Developer:
Version:
4.57
Platform:
Thermal Receipt Printer Driver Download Windows 10 64 Bit
Table of Contents
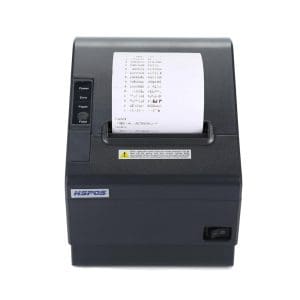
SPRT POS891 Thermal Receipt Printer Driver Download Windows 10 64-Bit:
Interface Drivers:
For your convenience, SPRT offers several installation guides to help you install this printer on a Windows computer. Simply select the driver type that is applicable to your operating system, and follow the installation steps provided in the guide. So, after successful installation, you should be able to print your POS receipts on the SPRT POS891 thermal printer. The printer is capable of printing multiple types of POS labels at high speed, making it an ideal choice for commercial use. You can even attach the printer to a wall using its convenient mountable design. It is a reliable and durable machine with a rugged construction.
How to Download and Install The Driver?
To download and install a Thermal Receipt Printer Driver on Windows 10 64-bit, follow these steps:
- Check Printer Model: First, identify the exact model of your thermal receipt printer. You can usually find this information on a label or sticker on the printer itself.
- Visit Manufacturer’s Website: Go to the official website of the printer manufacturer. Look for a “Support” or “Downloads” section. In this section, you should find drivers and software for your printer model.
- Search for the Driver: Use the website’s search feature or navigate through its menus to find the driver specifically designed for your printer and Windows 10 64-bit. Make sure you download the correct driver for your printer model and the right operating system version (in this case, 64-bit).
- Download the Driver: Click on the driver download link and follow the on-screen instructions to download the driver package to your computer. It’s usually a file with a .exe or .msi extension.
Driver Installation:
- Install the Driver:
a. Locate the downloaded driver file and double-click on it to run the installer.
b. Follow the installation wizard’s instructions. So, you may need to accept a license agreement and choose installation options. Make sure to select the correct printer model during installation.
c. The installer will copy the necessary files and set up the driver for your printer. Once the installation is complete, you may be prompted to restart your computer. If not, it’s a good practice to do so.
- Connect the Printer: Ensure your thermal receipt printer is properly connected to your computer via USB, Ethernet, or any other applicable connection method. If it’s a USB printer, Windows should automatically detect it and configure it with the newly installed driver.
- Test the Printer: After installation and connection, it’s a good idea to print a test receipt or document to ensure that the printer is working correctly. You can do this by opening a text document or any application that can print and selecting your thermal receipt printer as the default printer.
- Configure Printer Settings: Depending on your specific needs, you may need to configure printer settings such as paper size, printing preferences, and default settings. So, this can often be done through the printer properties in the “Devices and Printers” section of the Control Panel.
That’s it! Your thermal receipt printer should now be successfully installed and configured on your Windows 10 64-bit system. If you encounter any issues during the installation process, consult the printer manufacturer’s support resources or contact their customer support for assistance.
Windows XP:
POS printers are used in conjunction with a point of sale (POS) system to print sales slips and receipts. These printers are available with various interfaces, including USB and serial ports. Some of them also offer Wi-Fi and Bluetooth connections. To connect to a thermal printer, you need a special driver that is compatible with your operating system. So, to install the drivers, follow the instructions that are provided by the manufacturer of the POS printer.
Adding a thermal receipt printer is a simple process, but you must make sure that you have the correct driver for your computer. Start by launching the explorer and selecting “Add a Printer” from the options. Click “Add a local printer or network printer with manual settings”. Enter a friendly name for the printer and select the correct port. If you are using a POS printer on a network, specify the share name.
When installing a new printer, it is important to have the latest Windows XP printer drivers. So, these are designed to work with the specific type of controller board in each printer. The driver will help you set up and use your device properly. The drivers are easy to download and can be found on the manufacturer’s website.
Depending on the printer you have, the drivers may vary in size and complexity. Most POS printers have a specific file, which is installed by navigating to the folder in which the driver has been saved. After that, the driver will be automatically added to the list of your local printers.