Canon G4010 Scanner Driver
Published:
February 29th, 2024
Updated:
February 29th, 2024
Developer:
Version:
1.3
Platform:
Canon G4010 Scanner Driver for Windows
Table of Contents
Canon G4010 Scanner Driver
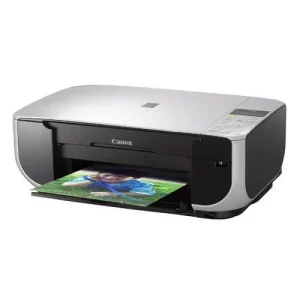
Canon makes some of the best all-in-one printers around, and this one is no exception. Its high-capacity integrated ink tank system cuts down printing costs and requires less frequent cartridge replacements. So, the latest version of Canon G4010 Scanner Driver is being provided here to download.
It has a decent black page yield and an impressive color print quality, making it ideal for home use. Plus, it’s low on power consumption and can perform automatic double-sided printing.
How to Download and Install the Driver?
- Select Operating System: On the support page, locate the section where you can choose your operating system. Select the version of Windows you are using (e.g., Windows 10, Windows 8, etc.).
- Download the Scanner Driver: Look for the scanner driver for the Canon G4010 model that is compatible with your Windows operating system. Once you find it, click on the download link to start the download process.
- Save the Driver File: Save the downloaded driver file to a location on your computer where you can easily find it.
- Run the Installer: Locate the downloaded driver file and double-click on it to run the installer. Follow the on-screen instructions to initiate the installation process.
- Connect the Scanner: Make sure your Canon G4010 scanner is connected to your computer and powered on during the installation process. The installer may prompt you to connect the scanner at a specific point.
- Complete the Installation: Follow the prompts provided by the installer to complete the installation. This may include agreeing to terms and conditions and specifying installation settings.
- Restart Your Computer: After the installation is complete, it’s a good practice to restart your computer to ensure that the changes take effect.
After these steps, the Canon G4010 scanner driver should be successfully installed on your Windows computer, allowing you to use your scanner with the supported software. If you encounter any issues during the installation process, refer to the documentation provided by Canon or check their support resources for troubleshooting assistance.
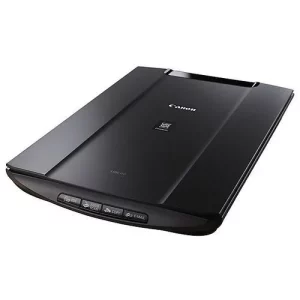
Auto Scan
When the scan button on your printer is pressed, the software automatically recognizes what type of item it is and adjusts scanning settings appropriately. This process is referred to as Auto Scan.
The program also allows for multiple items to be scanned at once. You can choose to save the scanned images as JPEG, PDF, or TIFF file types. It is also possible to set the number of copies you want and to add a watermark if desired.
While the program is very easy to use, it lacks a few important features. For example, it does not include any OCR or text recognition tools. This is a shame, as it would have made the program more useful. However, you can always find third-party OCR and text recognition programs that do a better job than this one.
In general, the program performs well when it comes to recognizing and adjusting image quality. The program can produce high-quality scans that are free of glare and shadowing. It is also able to handle most colors with ease.
In terms of functionality, the program is comparable to other scanner drivers. It supports TWAIN and ISIS driver standards. TWAIN is more common and often the only standard that is provided with consumer scanner models. However, ISIS is a more standardized interface and is recommended for higher-speed document scanning applications.
Auto Duplex Scan
If your office relies on two-sided printed documents, a scanner that supports duplex scanning can be real-time. Unlike simplex scans, which capture only one side of a document at a time, duplex scanning uses two sensors to automatically feed both sides of the paper through the scanner. You can choose to save the front and back sides of each document as separate files or merge them into a single file. This mind-boggling technology isn’t available in every scanner, however, so check your printer’s manual to see if it can support this feature.
This space-saving small office scanner is ideal for retail, banking, healthcare, and similar environments that need to digitize IDs, passports, photos, and other special documents. It can even handle thick publications and damaged papers. Its 1,500 page-per-day duty cycle is more than enough for most offices, too.
In addition to the convenience of duplex scanning, this model also has a robust design that is well-suited for busy environments. Its automatic document feeder has a 50-page capacity and it can quickly scan up to 40 pages per minute. You can also save your scanned items as separate files or a single image file with a variety of options including text recognition, black and white or color scanning resolution, and straightening crooked images. Its durable design is built to last and includes a generous warranty for peace of mind.
Custom Settings
Custom Settings are a great way to store configuration data and application settings. They are cached, so accessing them is low-cost and efficient. They also eliminate the need to use SOQL queries that count against Governor Limits. In addition, they can be deployed and updated asynchronously.
You can create either List-based or Hierarchy-based custom settings. List-based custom settings are visible to any user in your organization. Hierarchy-based custom settings are a great way to provide different data to users based on their role or organization. Custom settings can be deployed using packages or Metadata API/Change Sets. They can be accessed using Apex and Lightning components.
Custom settings do not have some of the features of Custom Objects such as picklists and relationships. They also do not support some of the standard Apex fields such as formula fields and data validation rules. However, they do allow you to store data that can be manipulated by Salesforce users directly.
Another advantage of custom settings is that they are easier to mock in unit tests than custom metadata types. In addition, they can be accessed and modified in test classes without the need for the “SeeAllData” annotation. However, they do not have some of the functionality that is available in custom objects such as workflow rules or related records updates.
Image Adjustment
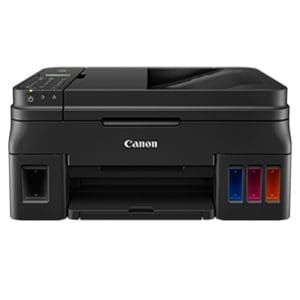
The Canon PIXMA G4010 is not just a printer; it also doubles as a scanner and copier. This combination of features makes it an ideal choice for personal and professional use. Its flatbed scanner can be used to scan documents, photos, or artwork. Its high-resolution output and built-in document feeder enable users to perform large batches of scanning in no time at all. In addition, this scanner offers support for wireless printing, allowing users to print from mobile devices.
The Image Adjustment feature allows you to make a variety of adjustments to your images. These adjustments can be applied to individual pixels, layers, or entire groups of layers. Each adjustment type has its own set of options and settings, which are displayed as easy-to-use sliders in the Image Adjustment dialog box.
Some of the most popular adjustment types include Levels and Curves. The Level adjustment remaps channel values across three points (white, black, and middle) to control the interpolation of lights, darks, and grays in an image. The Curve adjustment can boost contrast in an image by modifying the curve of each RGB color channel along an S-curve.
Another great tool is the Vibrance adjustment layer, which can increase the saturation of dull colors without affecting saturated ones. This can give your image a more vibrant and alive look.